Windows Commands Revealed SSD Problems My Benchmarks Never Showed
Running a few Windows commands revealed SSD health and filesystem issues that CrystalDiskMark benchmarks completely missed.
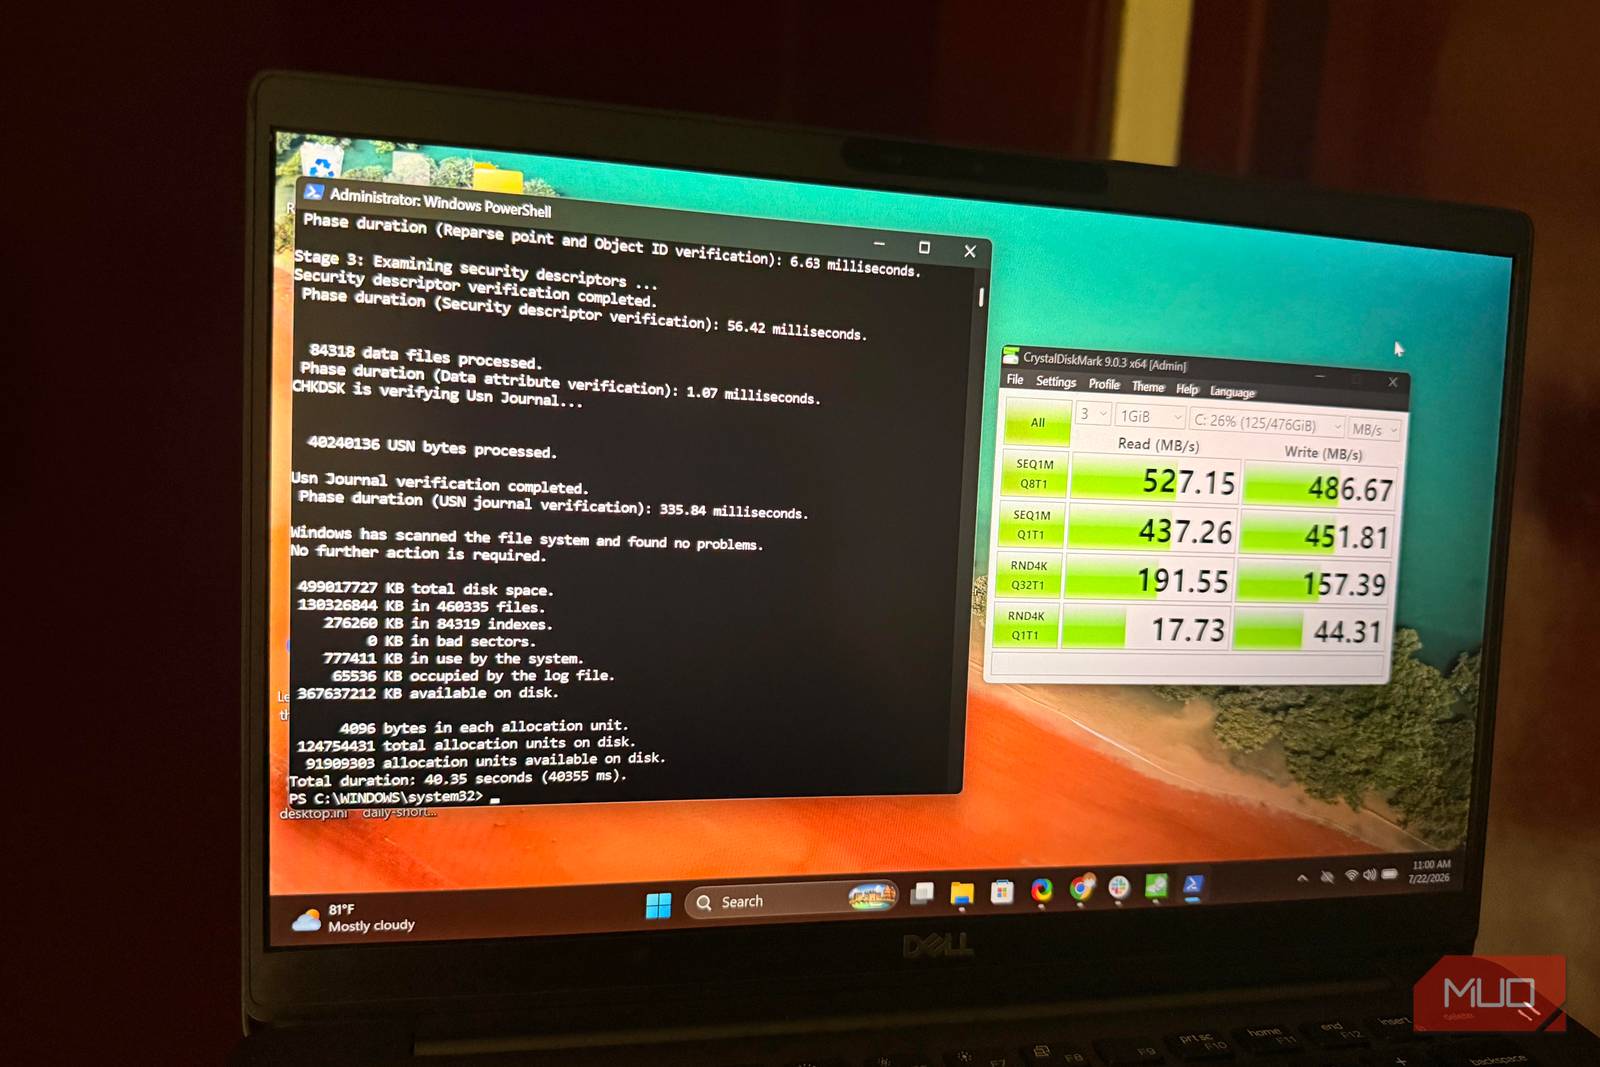
I always run a benchmark after installing a new SSD. Glancing through the numbers often gives reassurance that all is fine. However, this habit caught up with me. Using a handful of Windows commands revealed things about my SSD that even CrystalDiskMark never surfaced. I could finally see the drive’s reliability and a setting that might have been harming it. That momentary snapshot of raw throughput is just one part of the story, and I now check it differently.
Windows Had a Second Opinion on My SSD
Get-PhysicalDisk Showed Me Something a Benchmark Never Could
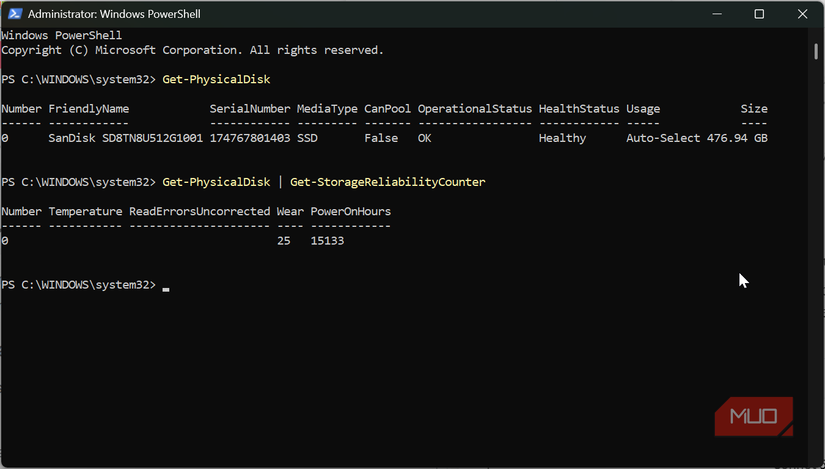
I’ve run CrystalDiskMark on this SSD many times, and it has always shown good read and write speeds. However, simply out of curiosity, I opened PowerShell and ran this command:
Get-PhysicalDiskAmong the results were three interesting fields: HealthStatus, OperationalStatus, and MediaType. They piqued my interest because they never appeared on a benchmark chart. These values reflect what Windows Storage considers the drive’s current health and operational status. It’s a separate health assessment from what manufacturer utilities typically report; it isn’t a measure of how quickly the drive may move data.
I also queried the drive’s wear level and power-on hours using:
Get-PhysicalDisk | Get-StorageReliabilityCounterYou can’t always rely on Get-StorageReliabilityCounter — support depends on the drive, controller, and driver. Your specific SSD may not return any useful information here.
Sometimes the Filesystem Is the Real Problem
CHKDSK Detects Corruption That SSD Health Checks Miss
Even though the first command showed the drive was healthy, this still doesn’t explain why a certain folder may not open. Running the command below fixed that.
chkdsk C: /scanIt scanned the filesystem without making changes and reported errors. CHKDSK on an SSD focuses primarily on filesystem integrity (the NTFS filesystem itself) instead of physical surface checks associated with hard drives. This includes the file records, indexes, and security descriptors that keep track of where items are on the drive.
| Symptom | What it usually means | Can CHKDSK catch it? |
|---|---|---|
| Folder won’t open | Index corruption | Yes |
| Random file goes missing | Orphaned file record | Yes |
| Drive runs slow overall | Hardware wear | No |
| System won’t boot | Boot sector damage | Sometimes |
Afterward, I ran chkdsk C: /f to fix the issues the scan reported. The problem wasn’t the drive itself, but the filesystem on it.
One TRIM Setting Worried Me More Than It Should Have
fsutil Confirmed It Was Still Working Behind the Scenes
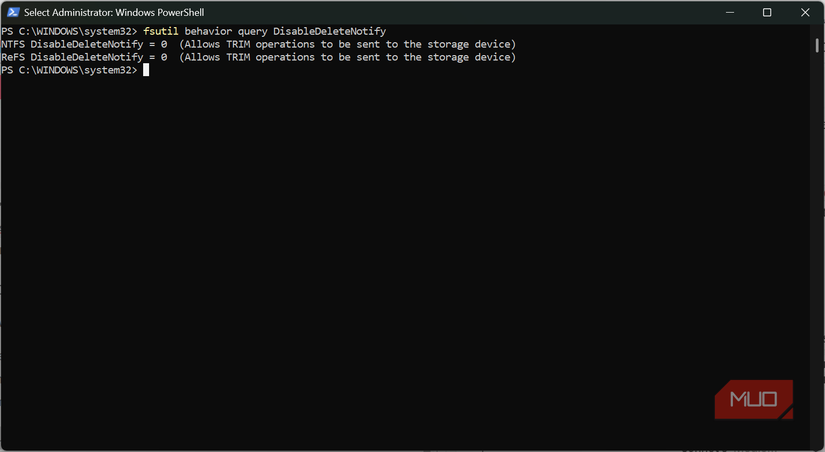
TRIM is the mechanism that tells an SSD which data blocks are no longer in use and can be wiped, helping the drive maintain performance over time. To check whether it was enabled, I ran:
fsutil behavior query DisableDeleteNotifyA result of 0 means TRIM is active; a result of 1 means it is disabled. Mine returned 0, so TRIM was working correctly in the background — something no benchmark result would have told me. If yours shows 1, you can re-enable TRIM by running the following command in an elevated PowerShell window:
fsutil behavior set DisableDeleteNotify 0Together, these three commands — Get-PhysicalDisk, chkdsk, and fsutil — gave me a far more complete picture of my SSD’s condition than any benchmark chart ever had. Speed numbers are useful, but they don’t tell you whether your filesystem is intact, how worn your drive actually is, or whether the features keeping it healthy are switched on. Running these checks periodically takes only a few minutes and can surface problems worth addressing before they become serious.