How to Stop Windows Defender From Deleting an Executable File
Windows Defender can delete flagged executables before you open them. Here's how to restore, exclude, or allow those files safely.
Windows Defender is always running and it scans your system whenever it is idle. On average, the anti-virus will scan your system twice a week to make sure nothing malicious is running on it. That doesn’t mean it’s ‘off’ or ‘disabled’ outside those scan periods. Not only does it scan new files on your system, but it also proactively deletes anything that it thinks is malicious. What this means is, if you download an executable file that Windows Defender thinks is malicious, it will delete it before you can even open File Explorer to the file’s download location. Here’s how to stop Windows Defender from deleting an executable file.
A word of caution
Windows Defender flags files that it thinks are dangerous and should not be allowed to run on your system. It is extremely rare that it should get a false positive but it can happen. To that end, you should know that you are taking a huge risk by running an app that Windows Defender has flagged. Do every bit of due diligence before you actually run the app. If it is malicious, it might not be obvious right away and by the time you realize the app has hijacked something, you may not be able to get rid of it.
When Windows Defender flags an executable, it may quarantine it, remove it outright, or block it from running depending on the type of detection and your current settings. If the file was quarantined, you can usually restore or allow it directly from Protection history. If it was removed entirely, that option may not be available - in that case, you will need to add an exclusion first and then re-download the file. To start, open Windows Security.
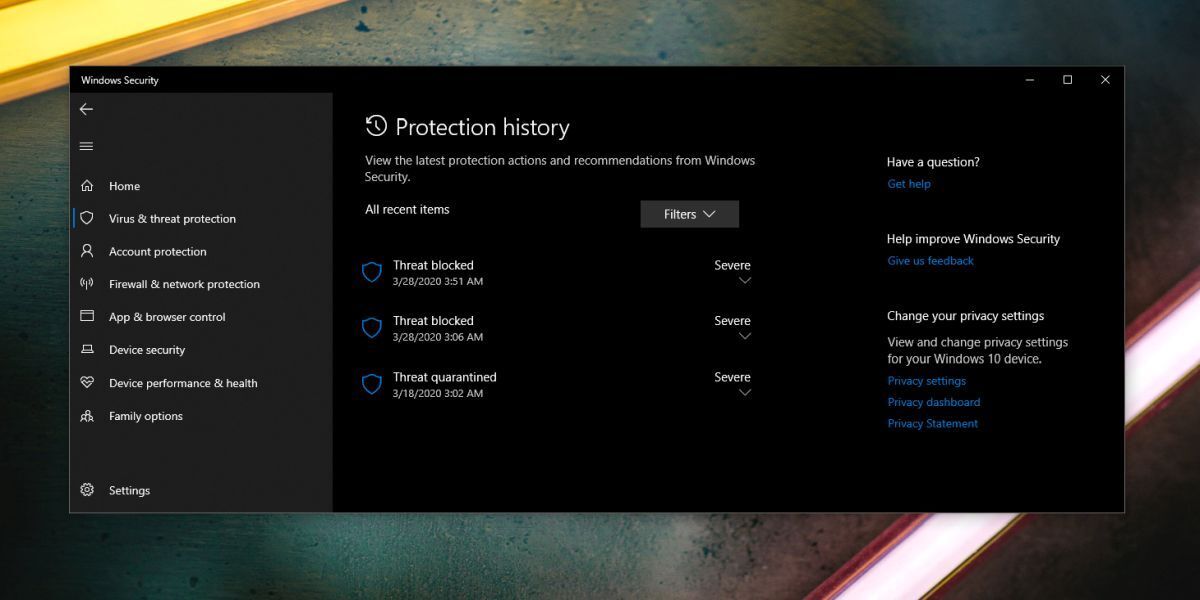
Go to Virus and threat protection and click Protection History under ‘Current Threats’. You will see a list of all threats that Windows Defender has blocked. The list doesn’t give much away except the date and time the threat was detected and blocked, and how serious it was. To get more information, you need to click the ‘Severe’ dropdown. At this point, you will need to authenticate with the admin user to proceed.
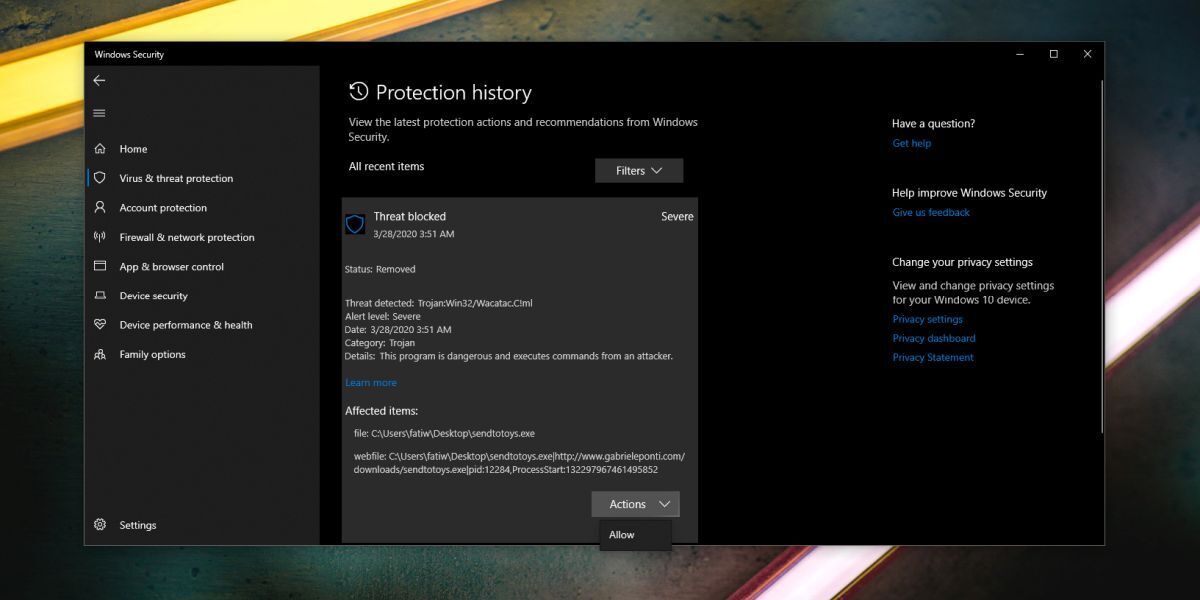
After authenticating with the admin user, you will see more details about the threat that was blocked. The entry will show you the affected file path, the threat name Defender assigned, and what action was taken. If the file was quarantined, you should see an option to either Allow on device or Restore - either of these will recover the file and tell Defender to leave it alone going forward. If the only action shown is that the file was removed, there is nothing left to restore. In that situation, skip ahead to the exclusions section below, add the file or its folder as an exclusion, and then download the file again. To allow the file to run when the option is available, open the Actions dropdown and select the ‘Allow’ option.

You may have to download the file again and this time, Windows Defender won’t block or delete it automatically. Once again, remember to be very careful when you decide to ignore warnings from Windows Defender.
Prevent Defender from deleting the file again with an exclusion
Allowing a past detection through Protection history is a one-time fix. If you want to make sure Defender does not keep removing the same file every time you download or build it, the better long-term solution is to add an exclusion. An exclusion tells Defender to skip a specific file or folder during scanning and real-time protection, which means it will not act on that item even if it would otherwise flag it.
To add an exclusion, open Windows Security and go to Virus & threat protection. Under Virus & threat protection settings, click Manage settings. Scroll down to the Exclusions section and click Add or remove exclusions. Click Add an exclusion and choose either File to target a specific .exe by its exact path, or Folder to cover an entire download or project directory.
Excluding a single file or a specific project folder is the safer approach compared to disabling Defender entirely, because the rest of your system stays protected. If Defender is removing a file the moment it hits your Downloads folder before you can do anything else, add the exclusion first, then attempt the download again. The exclusion needs to be in place before the file arrives for Defender to leave it alone.
If the file still gets deleted after you allow or exclude it
If you have worked through the steps above and the file keeps disappearing, Defender may not actually be the component removing it. Before troubleshooting further, open Protection history and confirm there is a recent detection entry that matches the file and the time it went missing. If no matching event appears in Defender’s history, Microsoft Defender is most likely not responsible.
The two most common causes in this situation are a third-party antivirus product running alongside Defender, or download protection built into your browser. Check whether you have a separate security suite installed - many pre-installed or trial antivirus programs run quietly in the background even when you think only Defender is active. Also check your browser’s download settings, since tools like Google Chrome’s Enhanced Protection can block or remove files independently of Windows Security. Identifying the correct layer that is acting on the file will point you to the right place to add an exclusion or allow the download.